How Does Pipsqueak Works
How to Download Pipsqueak Community
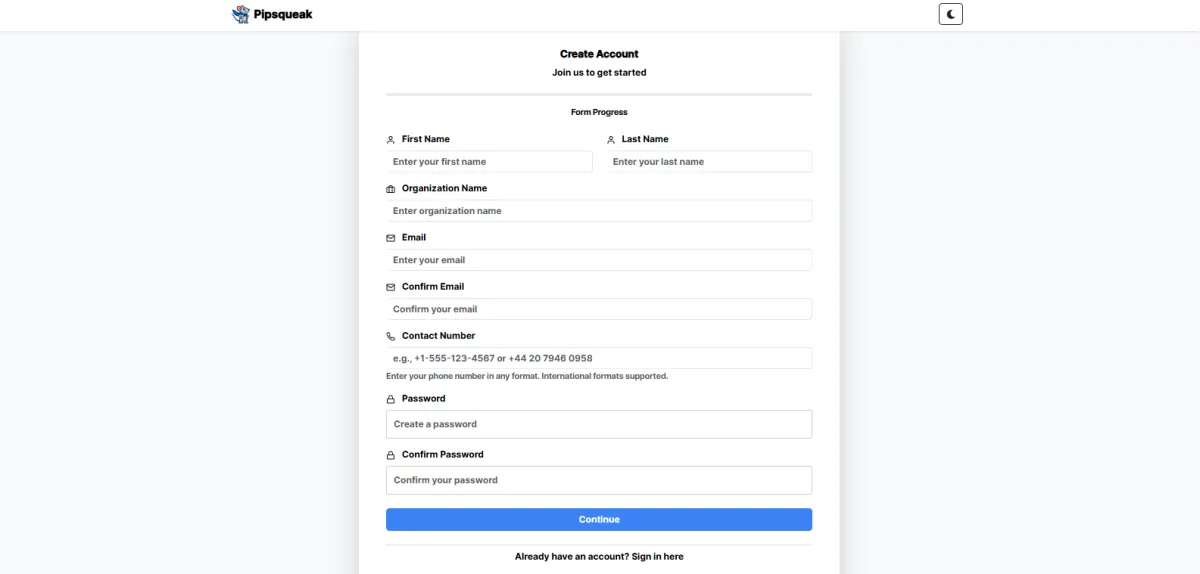
Step 1: Visit the Pipsqueak Homepage

Step 2: Click "Get Started" or "Login"

Step 3: Create your account or login
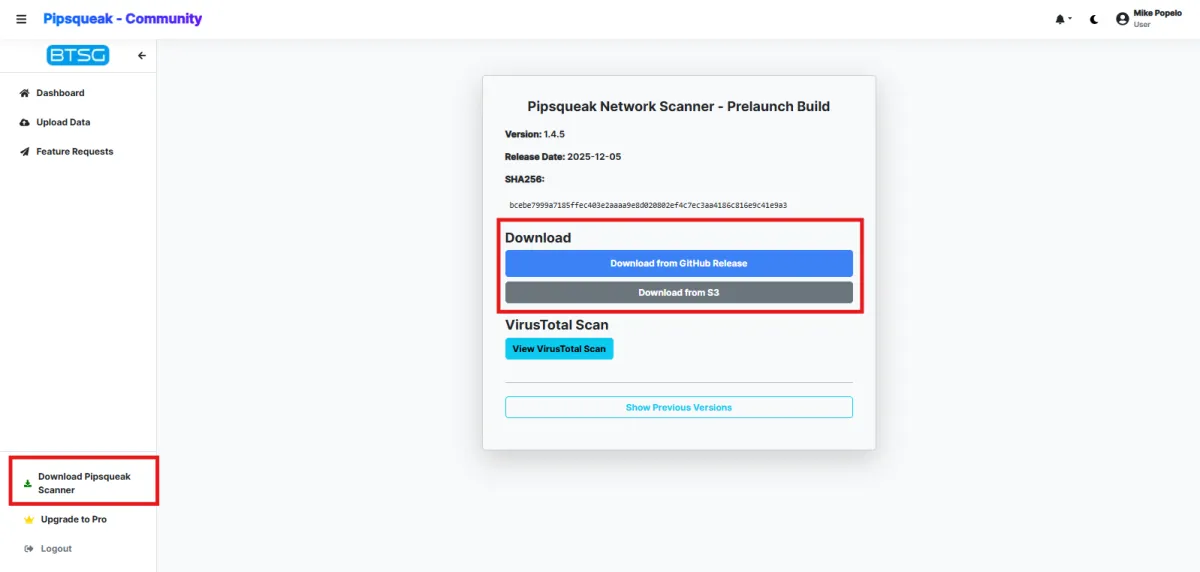
Step 4: Click "Download" in the left-bottom side
Stay up to date with the latest features and security improvements.
Follow the steps below to easily download and install the newest version of the Pipsqueak Network Scanner.
Learn Pipsqueak’s Features
Explore the core tools that make Pipsqueak powerful for your IT management
🌐 Network Scanner
- ✔ Network Scanning & Discovery
- ✔ Port & Service Enumeration
- ✔ System Information Gathering
- ✔ Disk and Storage Inspection
- ✔ User & Session Auditing
- ✔ Security & Access Control Checks
📂 Active Directory
- ✔ Network Scanning & Discovery
- ✔ Port & Service Enumeration
- ✔ System Information Gathering
- ✔ Disk and Storage Inspection
- ✔ User & Session Auditing
- ✔ Security & Access Control Checks
💻 Localhost
- ✔ Hardware & System Information
- ✔ Local Accounts and Admins
- ✔ Firewall Configuration
- ✔ Non-Default Services Audit
- ✔ Disk Information
- ✔ Remote Desktop Protocol (RDP)
🔑 Microsoft 365
- ✔ MFA (Multi-Factor Authentication) Assessment
- ✔ Excessive Admin Privileges
- ✔ User Account Inventory
- ✔ Conditional Access Policy Status
- ✔ Legacy Authentication Check
- ✔ Password Policy Audit
Don't see what you are looking for? Contact our support for quick help
Contact Support →Quick Fixes for Common Issues

Scan Won’t Start
Check credentials & network permissions.

Slow Scan Times
Close unused apps, check network load.

Devices Missing in Results
Verify discovery settings & IP range.
PII Scan Help Guide
This guide provides step-by-step instructions on configuring Personally Identifiable Information (PII) scanning in Pipsqueak, including entity selection, folder scanning, and log limits.
Configuring PII Scan in Pipsqueak
To enable Personally Identifiable Information (PII) scanning in Pipsqueak, you need to configure entity selection and folder paths.
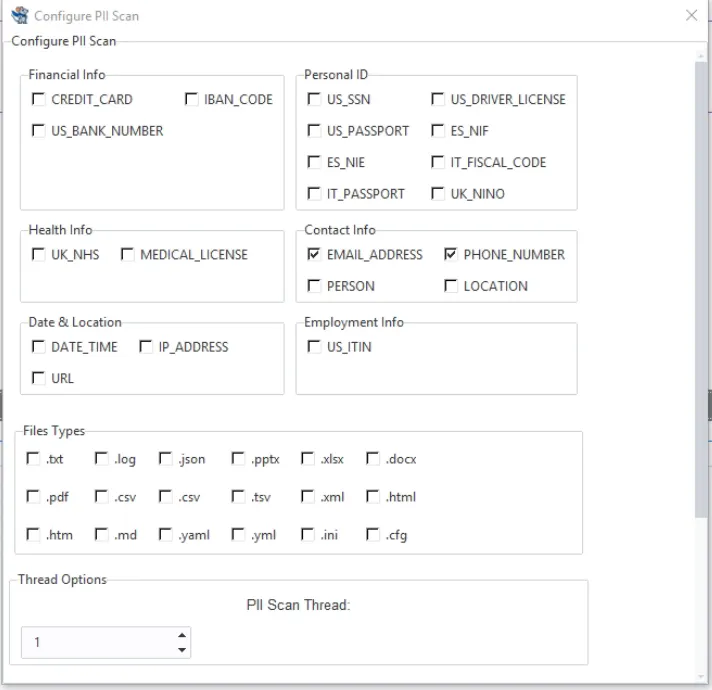
PII Entity Categories
The following PII data categories are available for scanning:
Financial Info: CREDIT_CARD, IBAN_CODE, US_BANK_NUMBER
Personal ID: US_SSN, US_DRIVER_LICENSE, PASSPORT (US, UK, IT, ES)
Health Info: UK_NHS, MEDICAL_LICENSE
Contact Info: EMAIL_ADDRESS, PHONE_NUMBER, PERSON, LOCATION
Date & Location: DATE_TIME, IP_ADDRESS, URL
Employment Info: US_ITIN
Adding Folders for Scanning
To scan specific files, add folder paths:
Add Folder: Opens a folder selection dialog to choose directories.
Remove Selected: Deletes selected folders from the scan list.
Finalizing Configuration
After configuring PII scanning settings:
Click "Apply": Saves selected entities and folders.
Refresh Action: Updates settings and reloads the scan.
Error Handling: If an invalid value is entered, a Validation Error popup will be displayed.
Localhost Scan Help Guide
This guide provides step-by-step instructions on configuring Localhost (Internal Network) Scanning in Pipsqueak, including port selection, scan settings, and validation.
Configuring PII Scan in Pipsqueak
To enable Personally Identifiable Information (PII) scanning in Pipsqueak, you need to configure entity selection and folder paths.
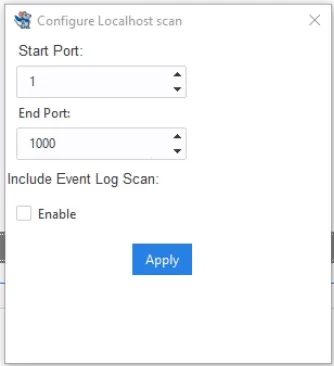
Setting Up Port Scanning
Localhost scanning allows users to specify a range of ports to scan:
Start Port: The first port number to scan (default: 1).
End Port: The last port number to scan (default: 65535).
Detailed Scan Option
Enabling detailed scanning retrieves extra information:
Service Version Detection: Identifies running services and software versions.
OS Detection: Attempts to determine the operating system.
Admin-Only Option: Certain detailed scans require administrator privileges.
Finalizing Configuration
After configuring Localhost scanning settings:
Click "Apply": Saves the port range and scan settings.
Refresh Action: Updates settings and reloads the scan.
Validation Rules
The system ensures input values are valid before applying changes:
Start Port: Must be a positive integer (1-65535).
End Port: Must be greater than or equal to Start Port.
Error Handling: If invalid values are entered, a Validation Error will be displayed.
Network Scan Help Guide
This guide provides step-by-step instructions on configuring Network Scanning in Pipsqueak, covering IP ranges, ports, threading, and protocol filtering.
Configuring Network Scan in Pipsqueak
The Network Scan feature in Pipsqueak allows users to scan external networks, checking for open ports, active hosts, and protocol-specific vulnerabilities.
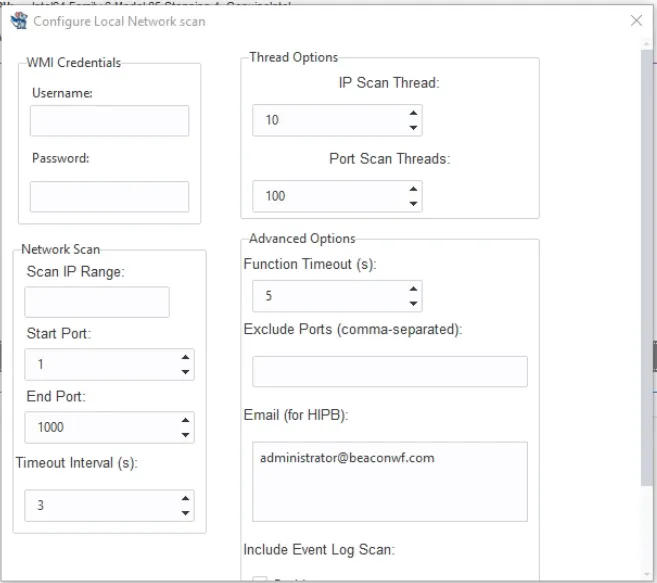
IP Range & Port Selection
Network scanning requires defining an IP range and port numbers:
IP Range: Enter the IP range in start-end format (e.g., 192.168.1.1-192.168.1.255).
Start Port: The first port to scan (default: 1).
End Port: The last port to scan (default: 65535).
Detailed Scan Option
Enabling detailed scanning retrieves extra information:
Service Version Detection: Identifies running services and software versions.
OS Detection: Attempts to determine the operating system.
Advanced Options
Fine-tune the scan with timeouts, protocols, and excluded ports:
Timeout Interval: Defines how long the scanner waits for responses (default: 500 seconds).
Protocol Filters: Choose between TCP, UDP, or Both for scanning.
Excluded Ports: List ports to skip (comma-separated).
Threading Configuration
Optimize the scan speed using threading options:
Host Scan Threads: Number of parallel host scans (default: 50).
Port Scan Threads: Number of parallel port scans (default: 100).
Validation Rules
To ensure correct input values, Pipsqueak applies the following validations:
IP Range Format: Must be start-end (e.g., `192.168.1.1-192.168.1.255`).
Start & End Ports: Must be valid positive integers (1-65535).
Timeout Value: Must be a positive integer.
Excluded Ports: Must be comma-separated positive integers.
Error Handling: If invalid values are entered, a Validation Error will be displayed.
Finalizing Configuration
After configuring Network Scan settings, follow these steps:
Click "Apply": Saves scan settings.
Refresh Action: Updates settings and reloads the scan.
Active Directory Scan Help Guide
This guide provides step-by-step instructions on configuring Active Directory (AD) scanning in Pipsqueak, covering domain controllers, authentication, and account monitoring.
Configuring Active Directory Scan in Pipsqueak
The Active Directory (AD) Scan feature in Pipsqueak allows users to monitor account activities, backups, and domain security settings.
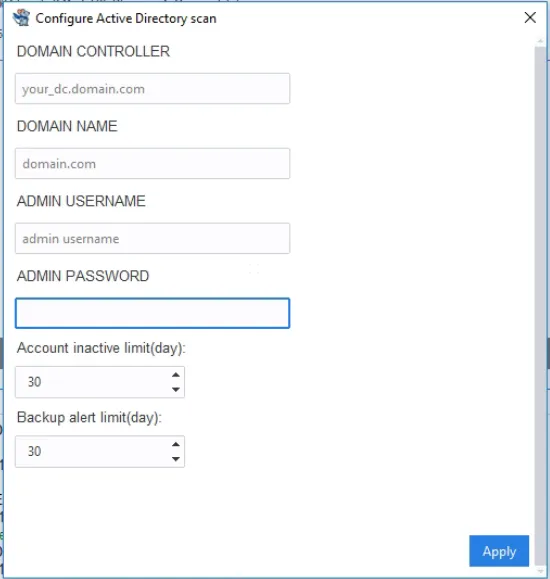
Domain Controller & Authentication
To enable Active Directory scanning, users must configure the following:
Domain Controller: Fully Qualified Domain Name (FQDN) or IP address of the AD server.
Domain Name: The name of your organization's Active Directory domain.
Admin Username: The LDAP username for authenticating the scan.
Admin Password: The password for the administrator account.
Security & Account Monitoring
Set up alerts for inactive accounts and missing backups:
Inactive Account Limit: Flags accounts that haven't logged in for X days.
Backup Alert Limit: Triggers an alert if no AD backup is found after X days.
Validation Rules
To ensure correct input values, Pipsqueak applies the following validations:
Domain Controller: Must be a valid FQDN or IP address.
Admin Username & Password: Required for authentication.
Inactive Account Days: Must be a positive integer (default: 90).
Backup Alert Days: Must be a positive integer (default: 30).
Error Handling: If invalid values are entered, a Validation Error will be displayed.
Finalizing Configuration
After configuring Active Directory scanning, follow these steps:
Click "Apply": Saves scan settings and credentials.
Refresh Action: Updates settings and reloads the scan.
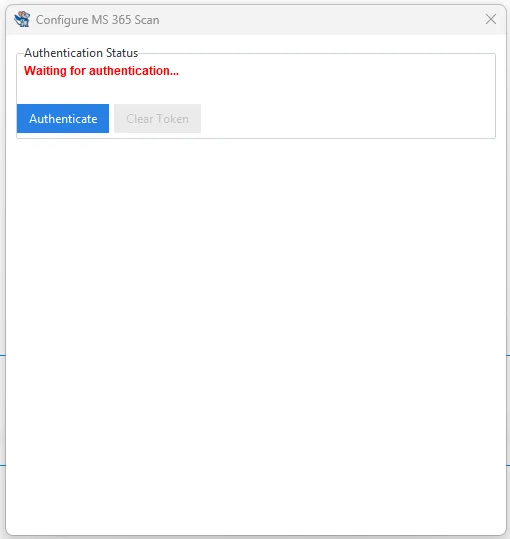
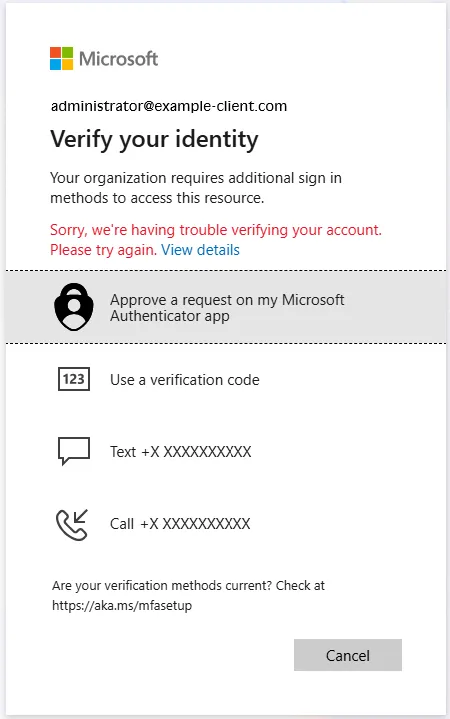
Microsoft 365 Scan Help Guide
This guide provides step-by-step instructions on configuring Microsoft 365 scanning for Pipsqueak, including required credentials, log limits, and permission setup.
Using Microsoft 365 Scan with Pipsqueak
To integrate Microsoft 365 Scan with the Pipsqueak application, you need to provide the following details.
Client ID: The unique identifier for your registered Azure AD application.
Tenant ID: The unique identifier for your Azure AD tenant.
Object ID: This is needed for assigning permissions.
Client Secret: A confidential key generated in Azure under Certificates & Secrets.
Permissions Setup
To allow Pipsqueak to access Microsoft 365 data securely, you need to configure the following:
Assign Permissions: Grant the necessary API permissions to your registered application.
Copy Consent URL: This URL allows admins to approve the required permissions.
Grant Permissions: The admin must use this option to finalize permission assignments.
Help Us Improve
Choose a form below to report bugs, request new features, or share feedback with our team.

Bug Report Form

Feature Request Form

Feedback Form
Need Help? Contact Our Quick Support
We’re here to help! Reach out anytime and our team will respond as quickly as possible.
Would like to cancel subscription?
Please fill out the form below so we can get started processing your request
Frequently Asked Questions
What is Pipsqueak?
Pipsqueak is a lightweight network monitoring and assessment tool that installs on a single machine and scans the entire network to identify all connected devices, giving you full visibility without complex setup.
How does Pipsqueak work?
Pipsqueak runs from a single device inside your network and performs a scan of connected systems, services, and shared resources. It does this all without sacrificing security or disrupting operations.
Do I need to install anything on each device?
No. Pipsqueak runs from a single Windows machine and is completely agentless. Absolutely no software is installed on endpoints and no one on the network knows it’s running.
What kind of risks does it detect?
Pipsqueak scans for risk related to network configuration, host configuration, software versioning, active directory configuration, backup configuration, password reuse and account breach, and Microsoft 365 configuration.
Is it safe to run on a live network?
Yes. Pipsqueak is designed to be non-intrusive. It performs passive and lightweight active scans without disrupting day-to-day network traffic.
What kind of reports does it generate?
Pipsqueak produces two main reports:
Risk Summary: A simple, business-friendly overview of vulnerabilities, misconfigurations, and exposed data.
Detailed Report: A technical breakdown of every finding, with device names, IP addresses, evidence, and remediation steps.

Scan
See everything.

Identify
Identify Potential Problems.

Empower
Empower Your Sales Team

Office Locations
Wichita Falls
506 7th Street, Wichita Falls, TX 76301
Oklahoma City
201 NE 50th St., Oklahoma City, OK 73105
Business Hours
M-F: 8AM — 5PM
Call Us
Copyright 2026. BTSG - Business Technology Solutions Group. All Rights Reserved.